Launch (Deploy) an Instance
- Jetstream virtual machines (VMs) are organized by projects.
- To access projects, click on
 from any screen.
 - To create a new project, click
 .
. - Fill out the name and description.
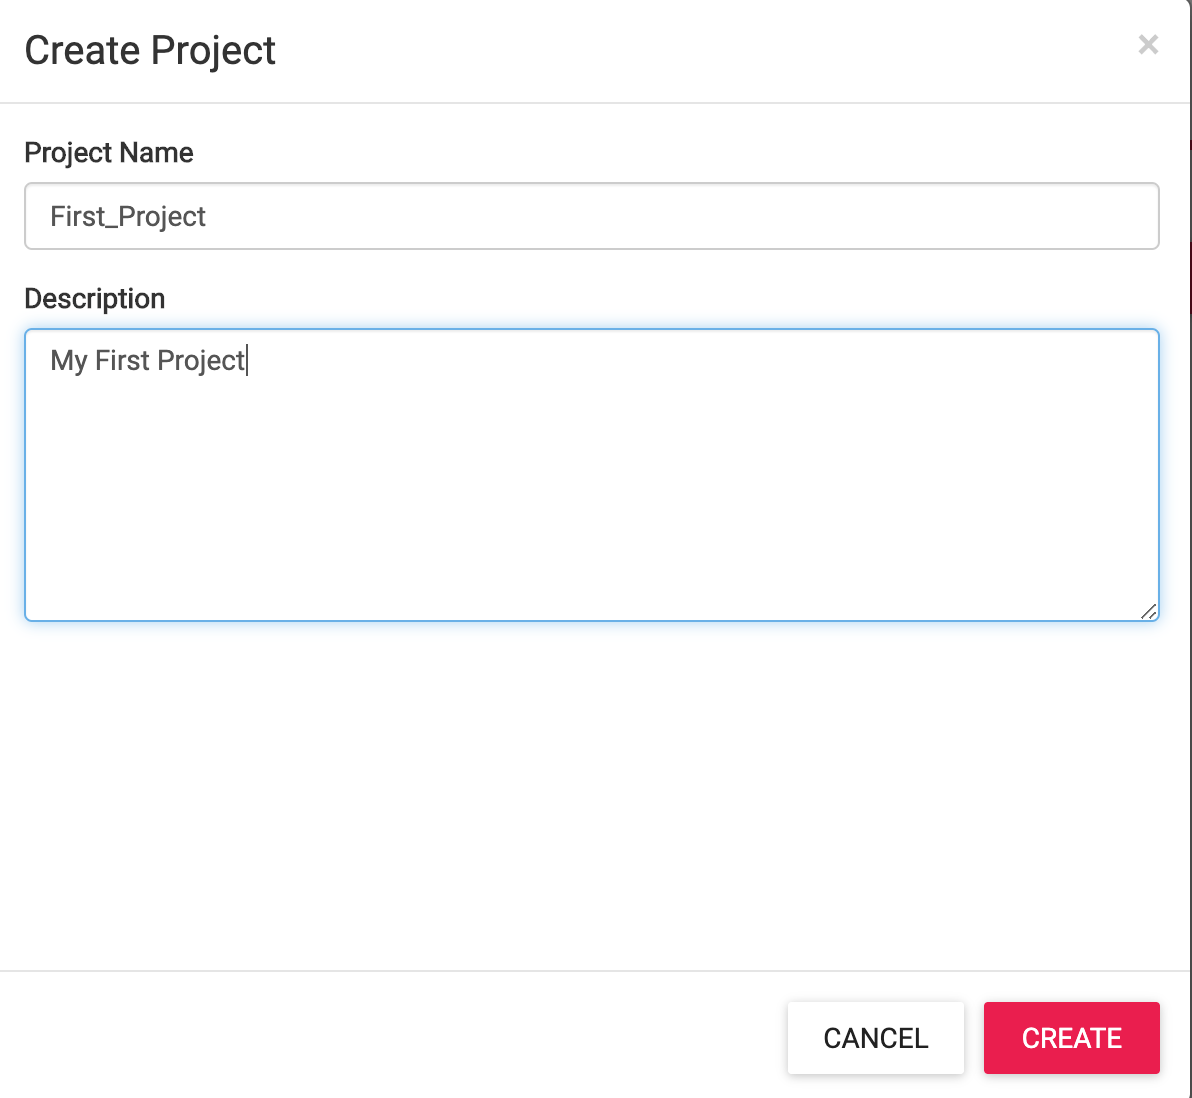 .
.
Best practice is to name a project something concise and informative so that, along with the description, one can quickly identify instance roles.
- To access projects, click on
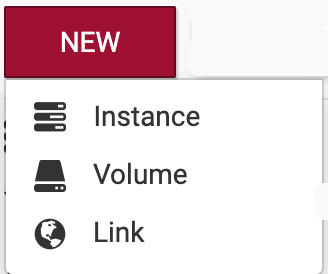
- Jetstream VMs may be started clicking
New> Instance.
 .
.
- This shows a catalog of
Images: Instances whose configurations have been saved as template from which to launch identical Instances. - On the page listing of images, scroll through the list or enter an image name, tag or description in the search box.
For instance, to locate images named or tagged with “Docker”, enter that text in the search bar.
The search is not case sensitive.
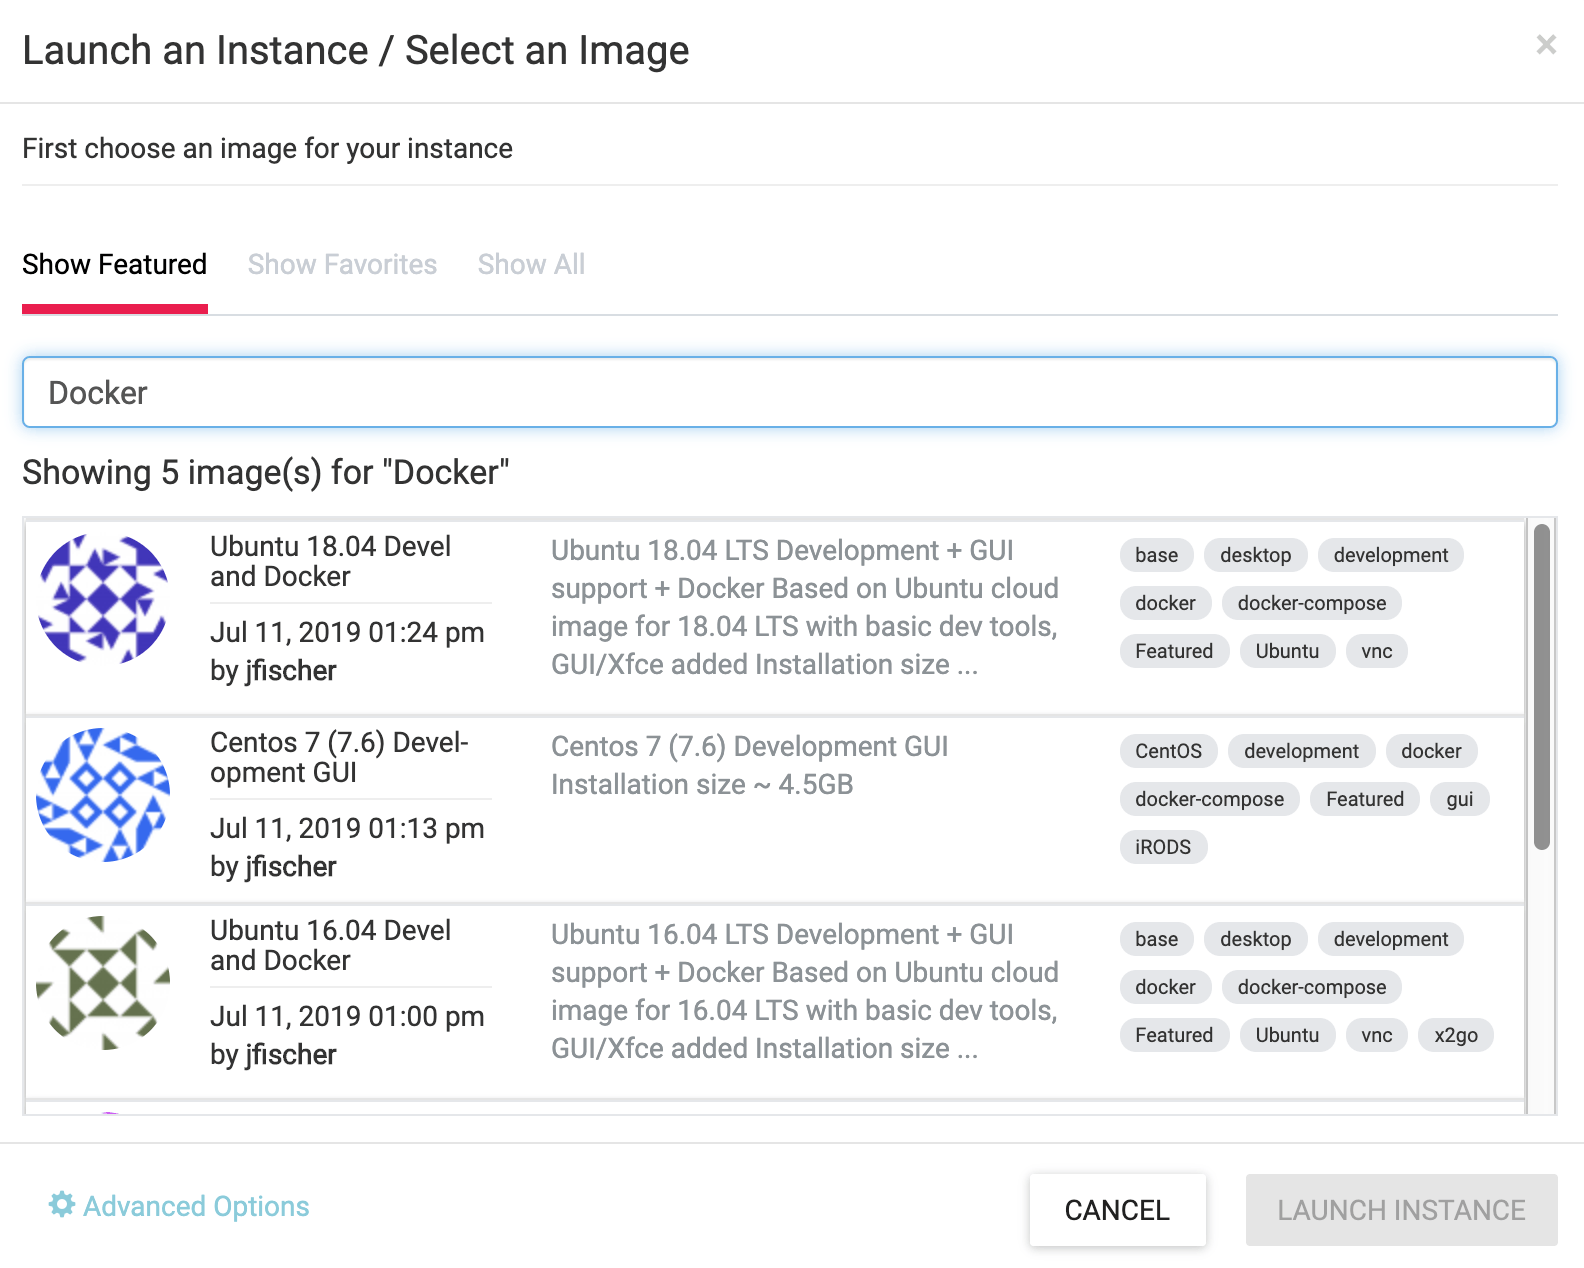 .
. Featured(system maintained) andPublicimages are shown.Featuredimages are recommended as these have been tested by Jetstream staff.
- This shows a catalog of
-
Selecting an image will show the
Launch an Instance / Basic Optionsscreen: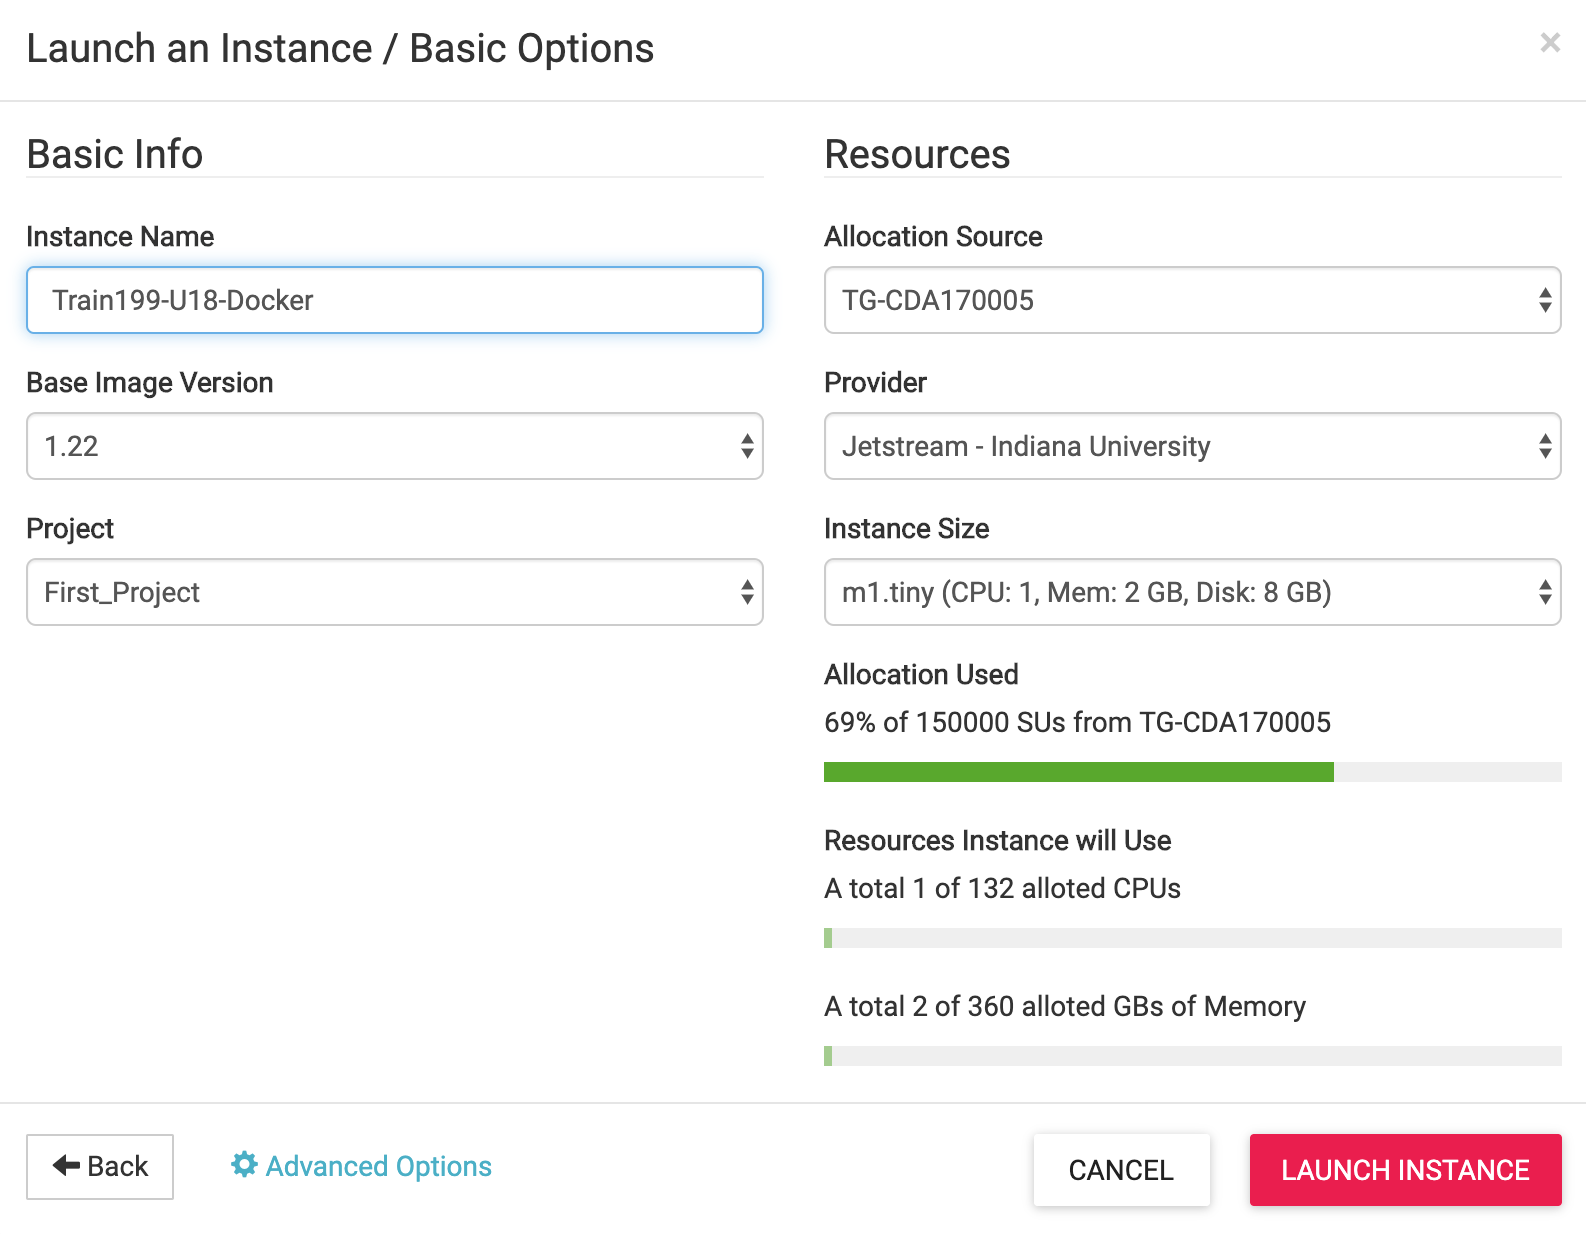
- Enter a name for the instance
- Select the image version if there are multiple versions available
- Select or change the project to hold this instance.
- Indicate the allocation source.
Allocations govern how much compute resources are available. These can be change on the fly. - Choose the provider to run on, Indiana or TACC.
Currently Jetstream has two partially independent clouds.
Some resources, like storage Volumes, are accessible only within the same provider. - Choose the instance size.
This indicates the vCPUs, memory, and disk size for the VM. See the Virtual Machine Sizes table to show the available options and the SUs consumed per hour.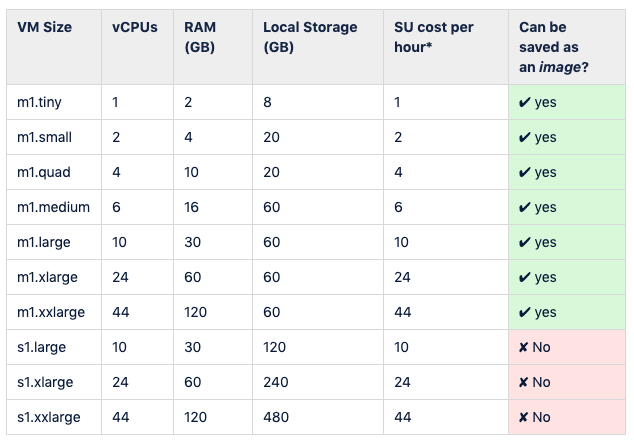
- Check projected resource usage: Allocation Used and Resources Instance will Use.
- Click
Launch Instanceto start the initialization and build of the instance.
-
When the instance is finished building and deploying, you’ll see the label changes to Status “● Active” and shows the IP Address:

- Click on the Instance name to see the characteristics of the Instance as well a various management actions that can be taken.
- Image: create a new Image from this Instance)
- Suspend: put the Instance to “sleep”
- Shelve: shutdown and store the Instance
- Stop: shutdown the Instance but do not store
- Reboot: restart the instance
- Redeploy: renew the cloud and IP status of the instance
- DELETE: remove the Instance
- Open Web Shell: Open a terminal window (command line) to the Instance
- Open Web Desktop: Open a VNC Desktop to the Instances
Note: avoid Old WebShell or Old WebDesktop as these are deprecated and going away soon.
| Previous: Initial Cloud Setup | Next: Webshell to VM | Top: Course Overview |